Certificate is curial in modern security and having a public trusted certificate is as must in public facing services. However, in lab or internal environment self-signed certificate works as good as public one. I have some difficulty on sign a self-signed certificate in my ADCS environment, so this post will work you through the process.
Let’s get to the obvious error. I found that if you create CSR using IIS and import the singed certificate, it will not work. I tried changing parameters but all did not work.(step 1~3)
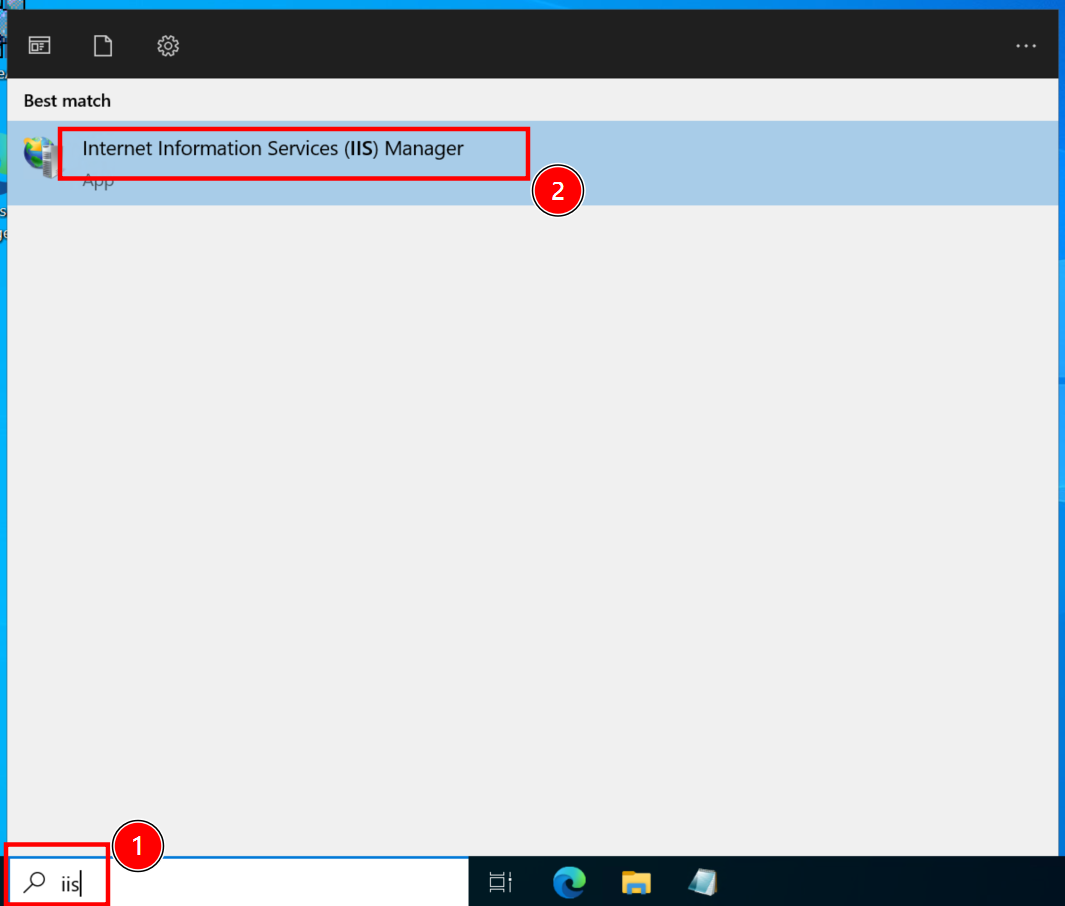
01. Open IIS Manager
02.Navigate to Server Certificate, then right-click, finally select Open Feature.
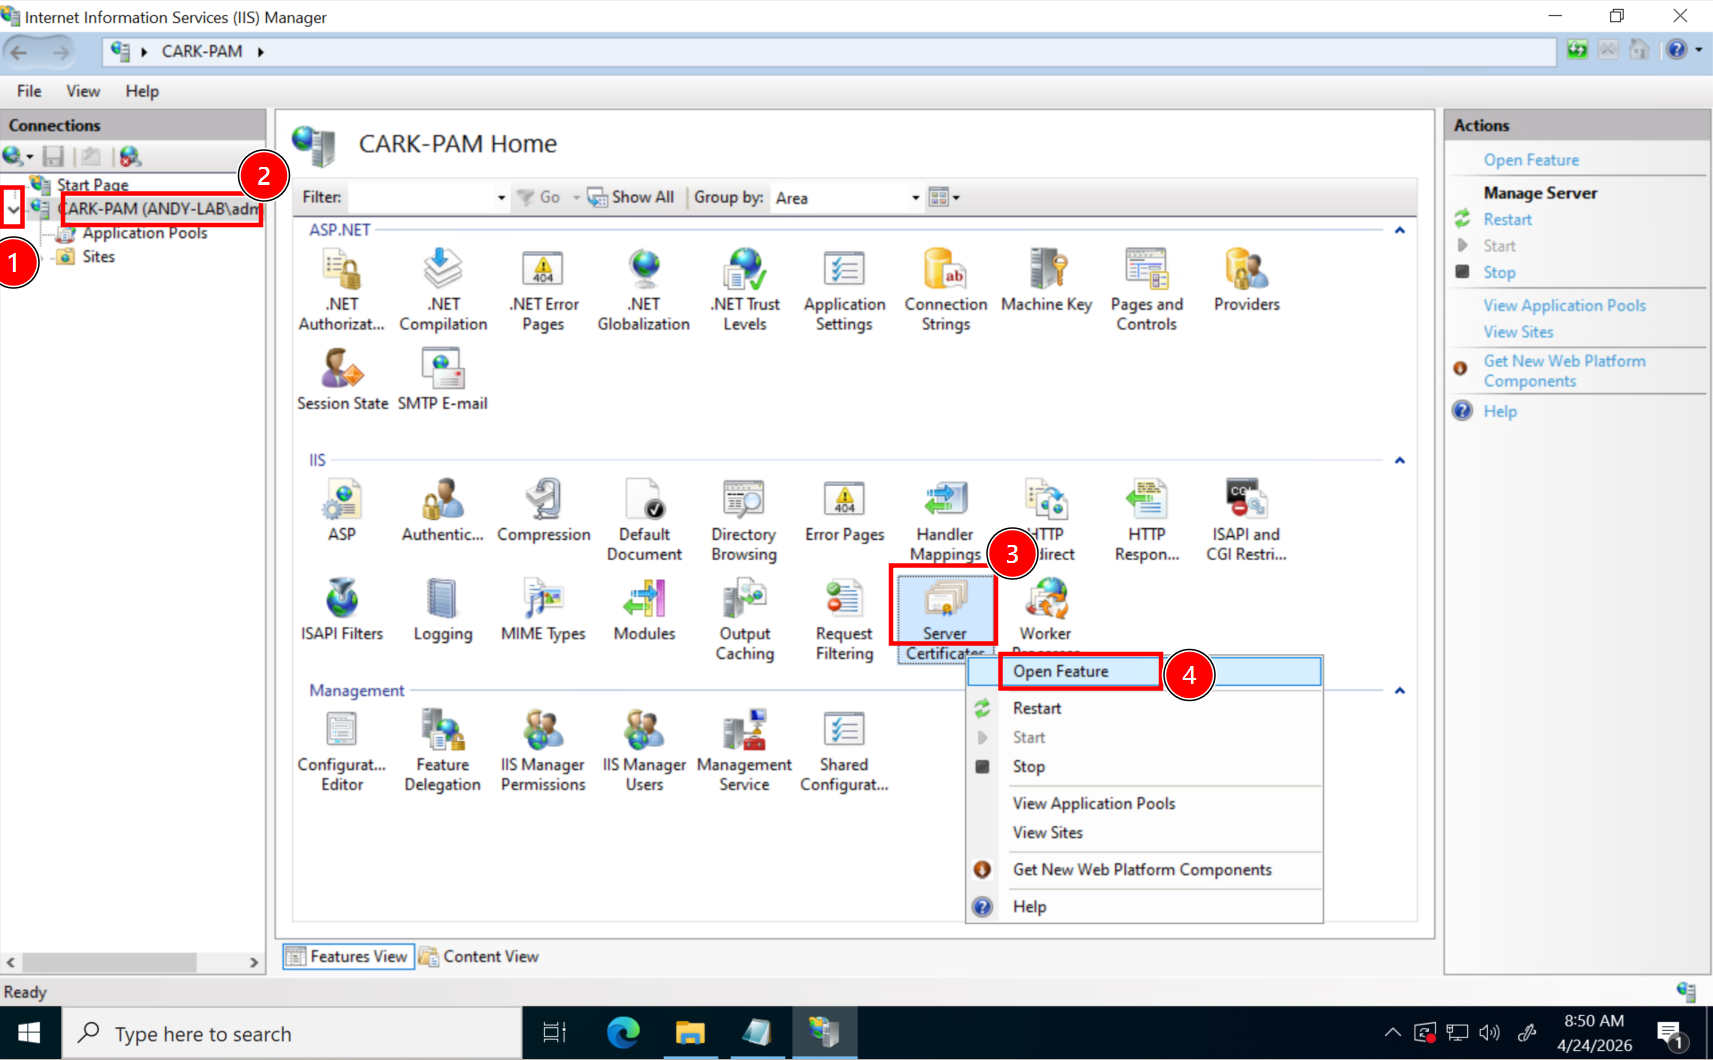
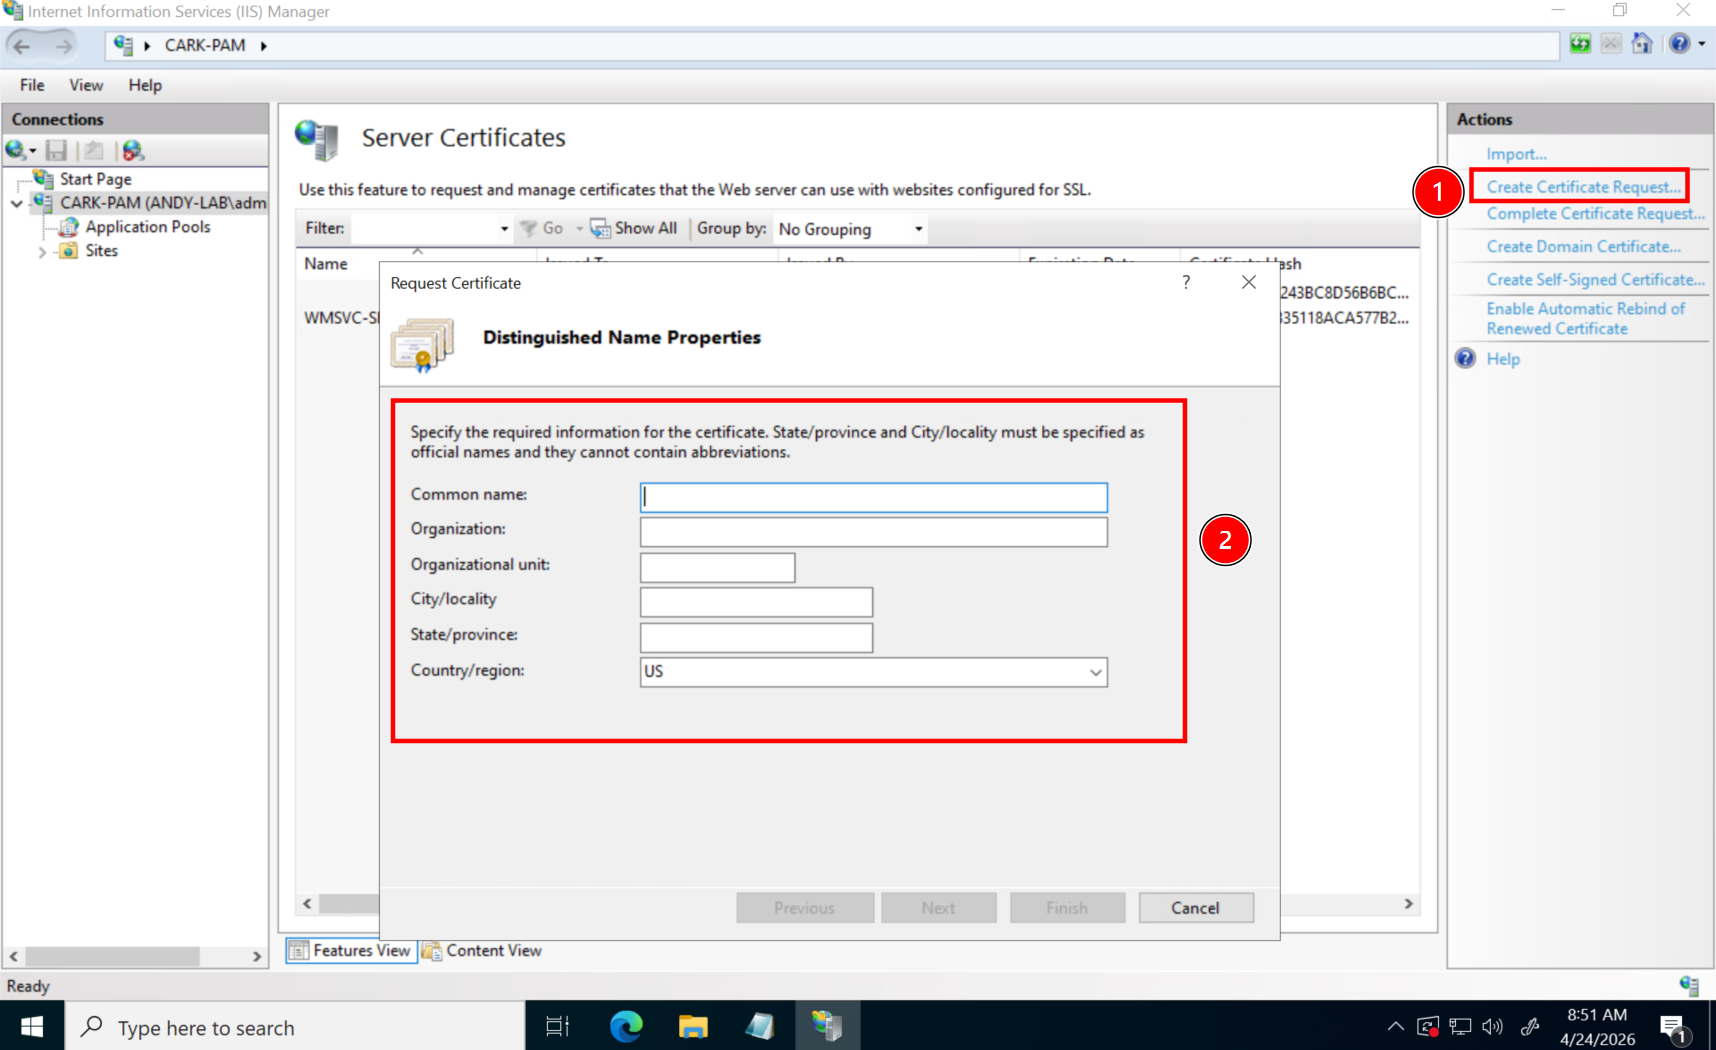
03. You will find Create Certificate Request on the right panel. But this does not work.
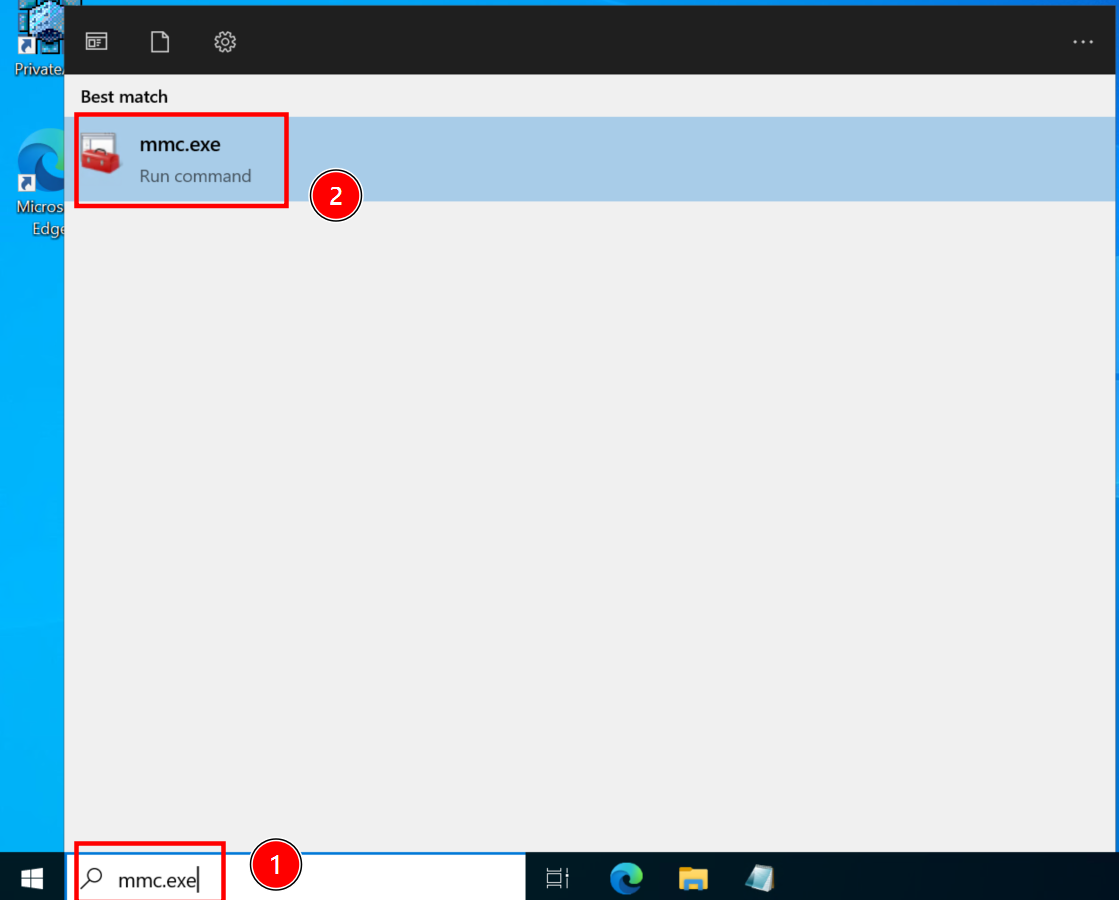
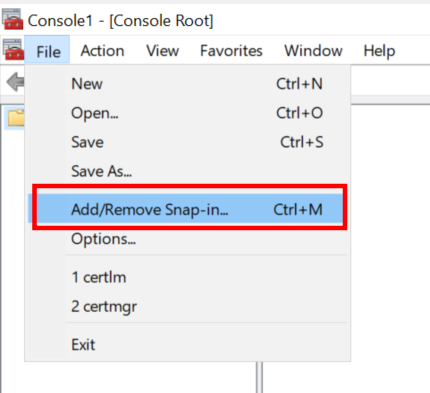
04. Open mmc
05. Add a new Snap-in
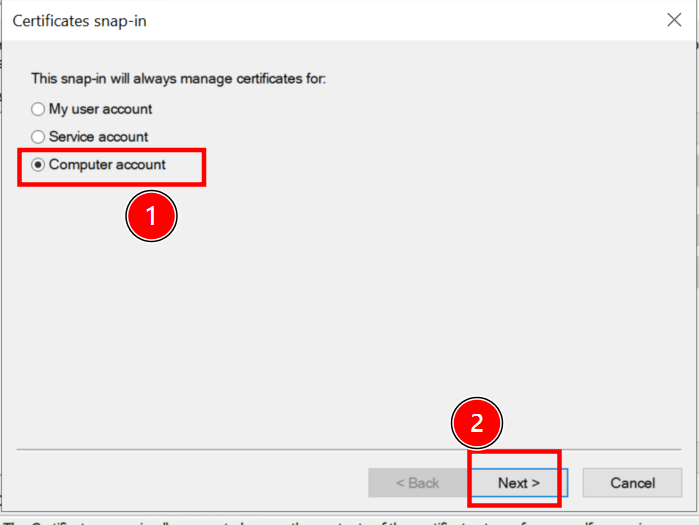
06. Select Certificates

07. Select Computer account
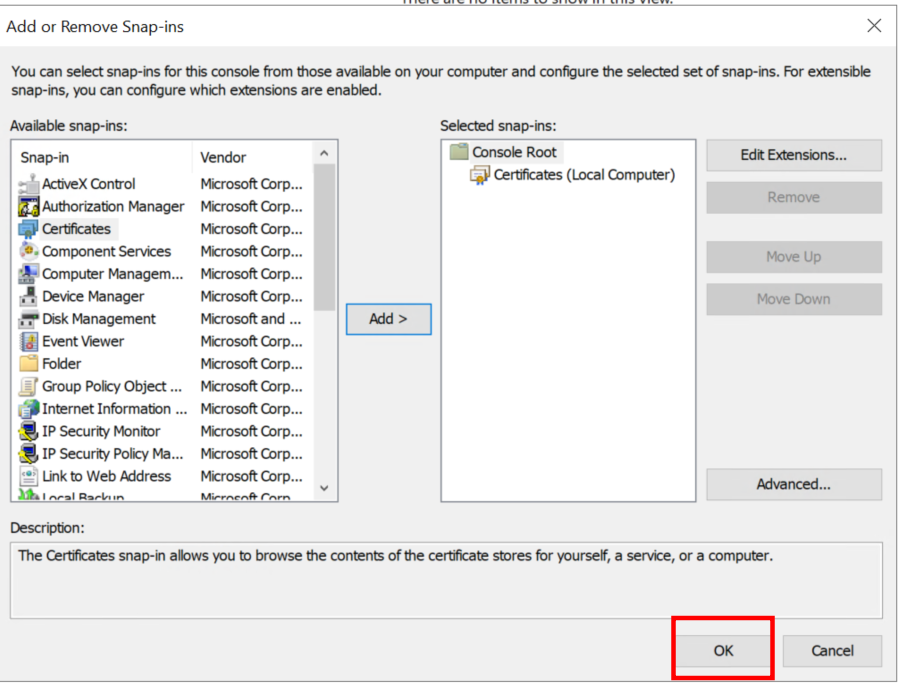
08. Accept default and finish

09. Confirm with OK
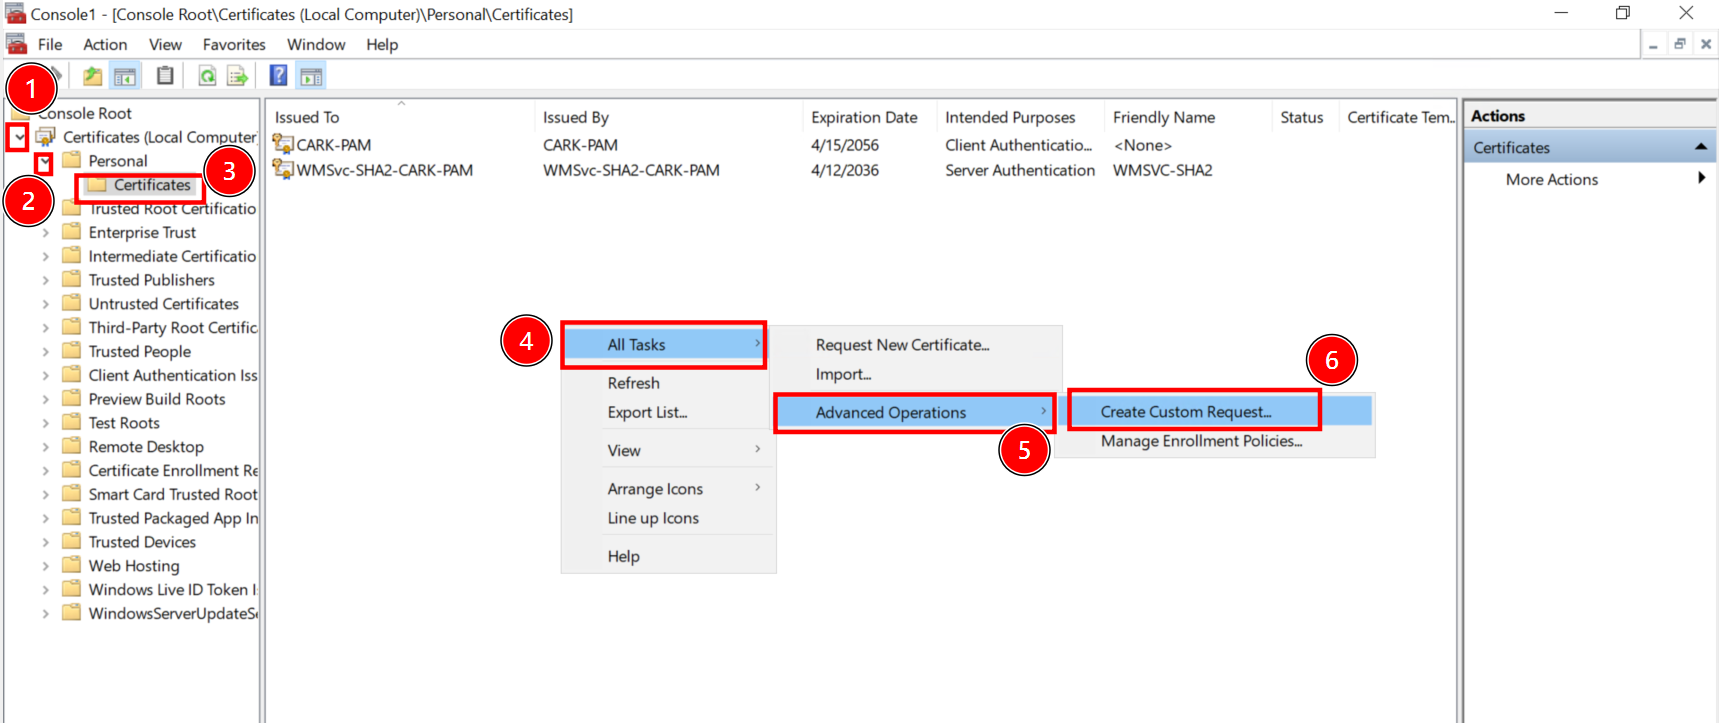
10. Navigate to Personal>Certificates, then right-click on middle panel. Then select All Tasks>Advanced Operations>Create Custom Request
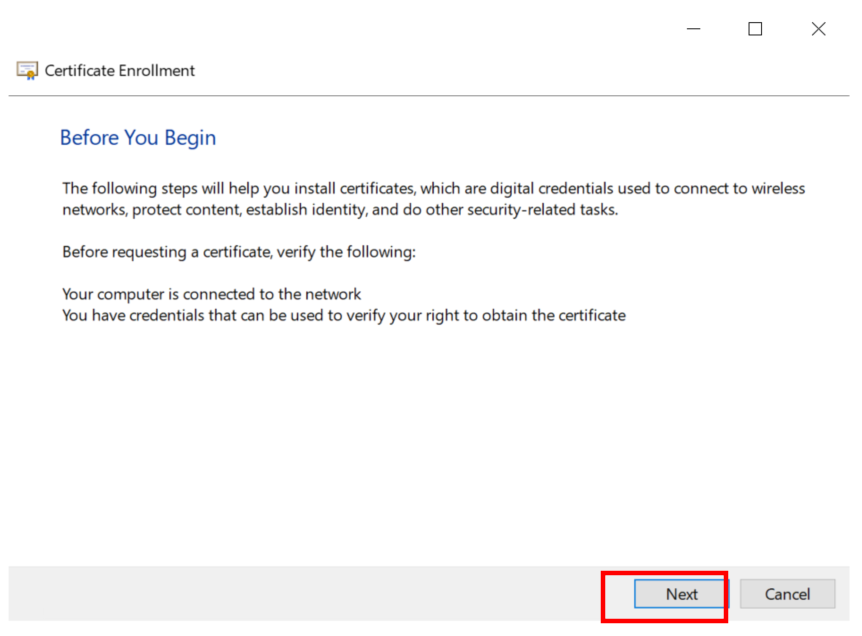
11. Accept with next
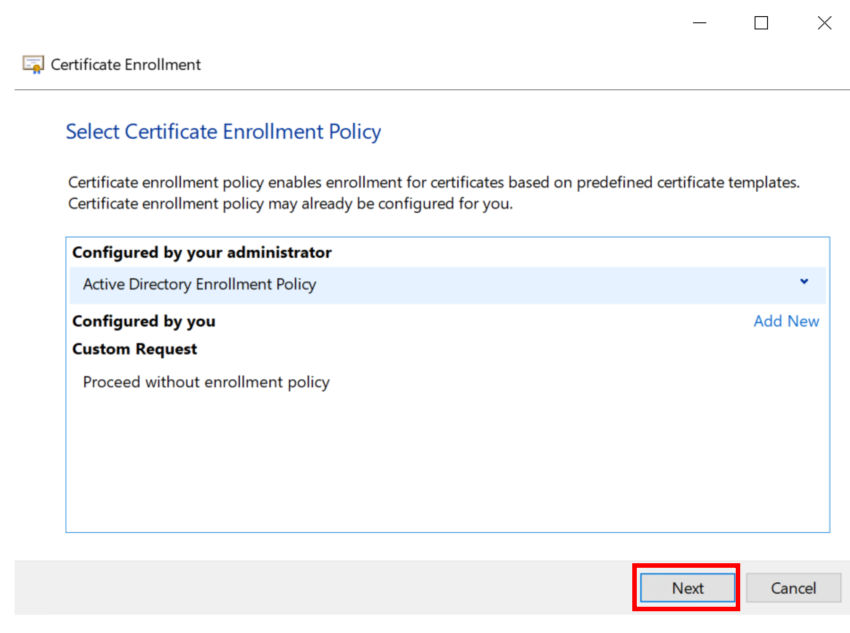
12.Accept with next
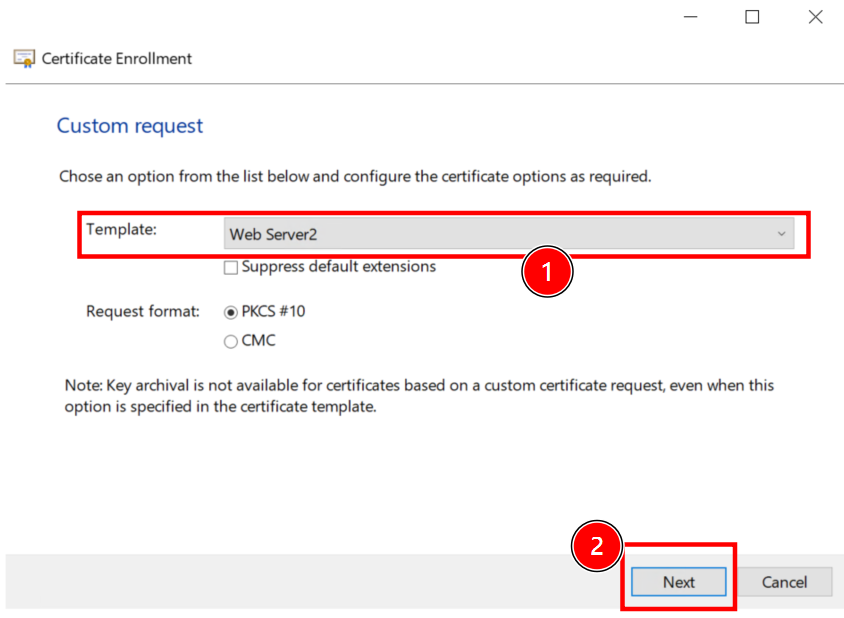
13. Choose your certificate template
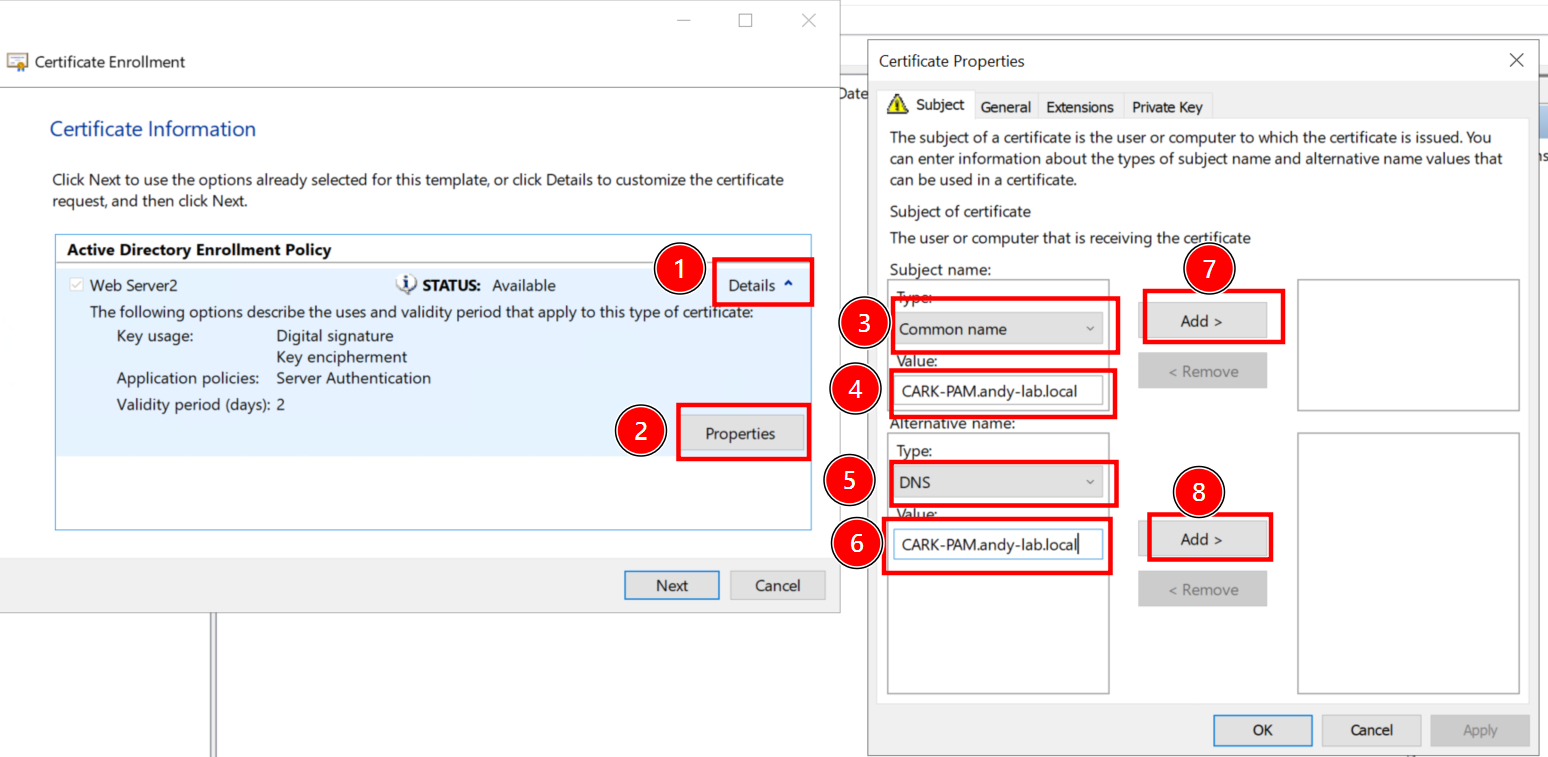
14. Change properties as you need. The minimum required info is CN and DNS name.
15. Check again your info is the same as your input
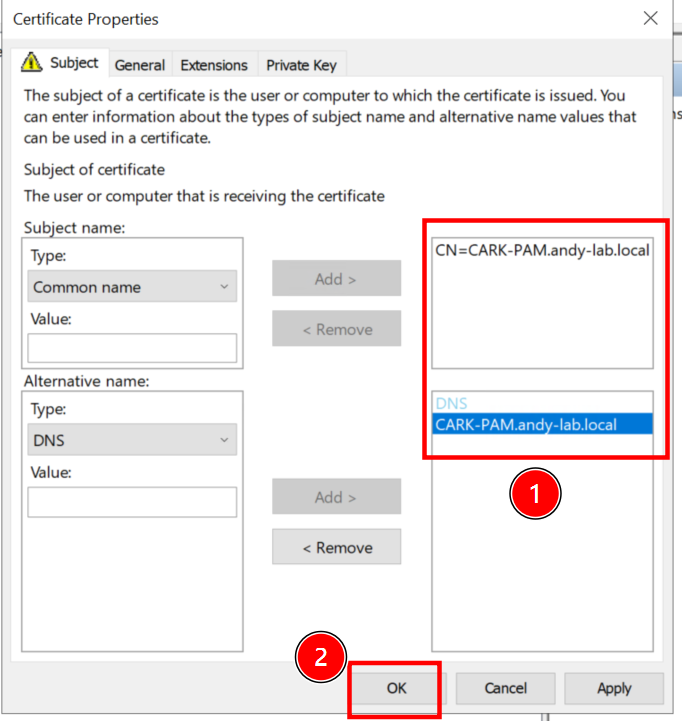
16. Next

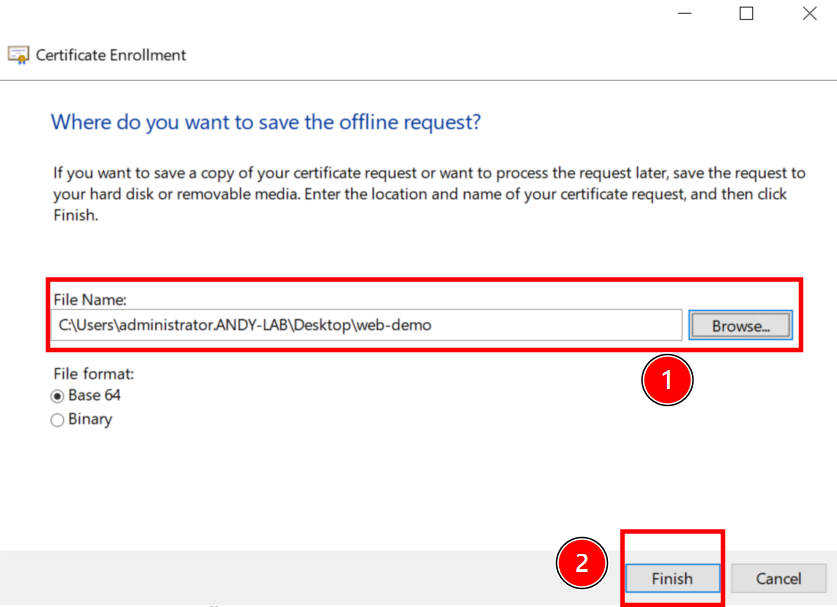
17. Choose where you want the CSR will be saved
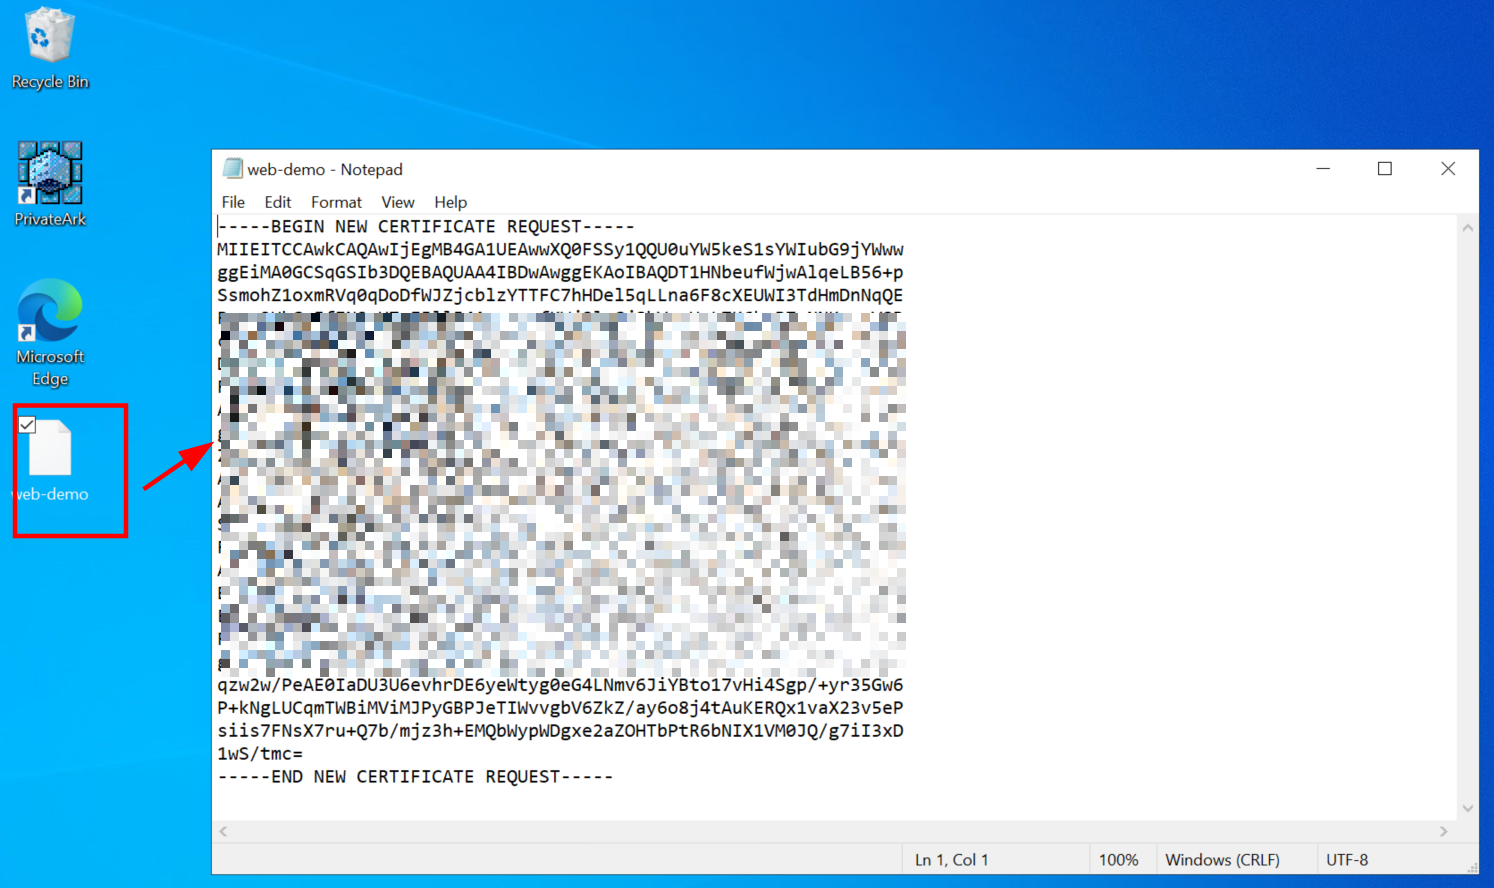
18. Check the CSR with notepad
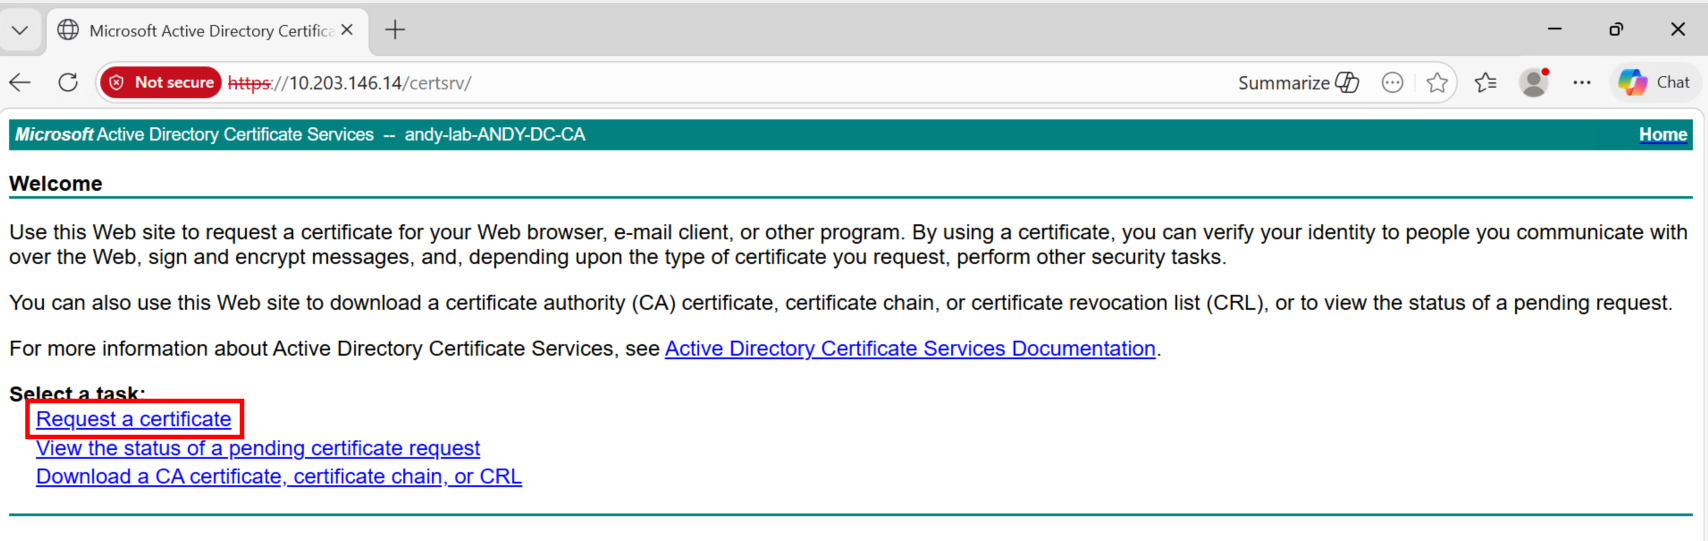
19. Go to ADCS web enrollment, at https://yourADCS/certsrv and click Request certificate
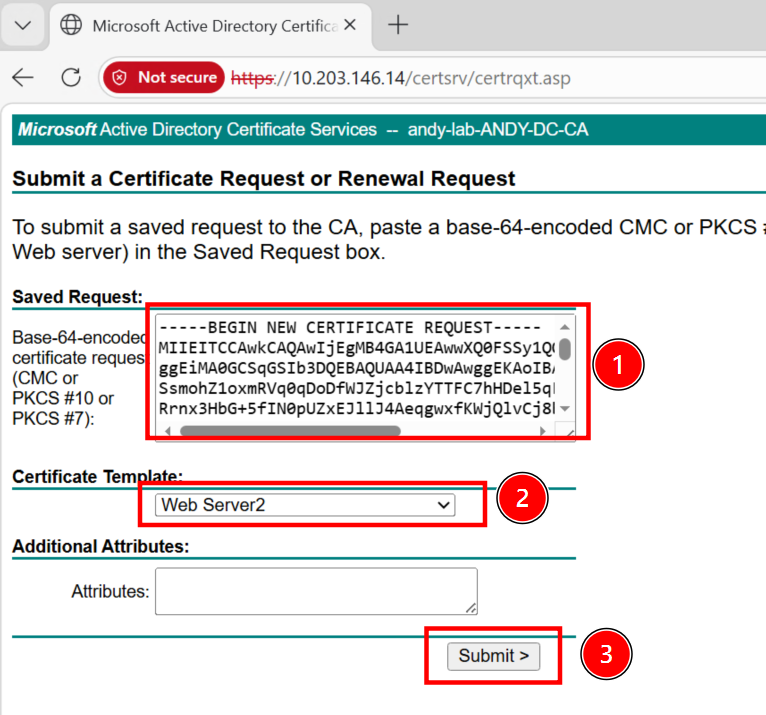
20. Select advanced certificate request
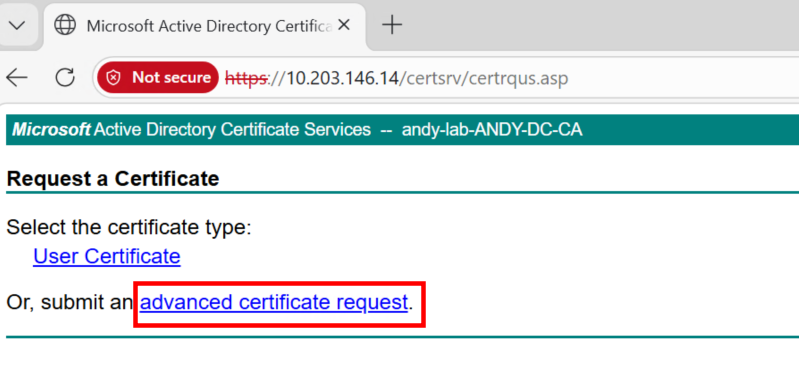
21. Paste the content you see in step 18, be carefully with format, you must paste as exact as it was. No additional space or new line. Finally select the template as you did in step 13
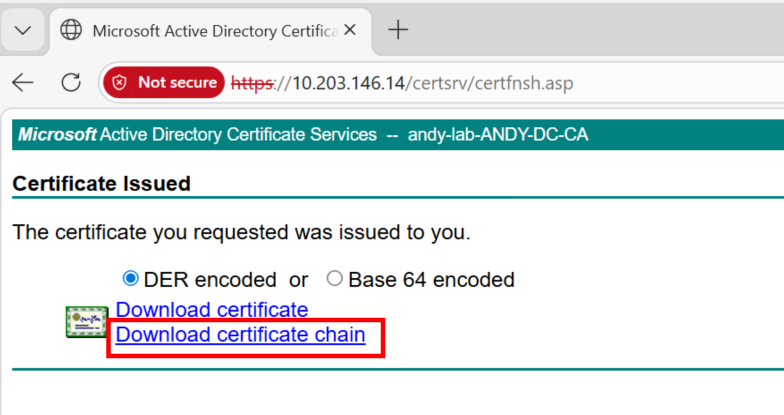
22. In ADCS, the certificate should be issued immediately. Select Download certificate chain.(When unsure, always use full chain of certificate)
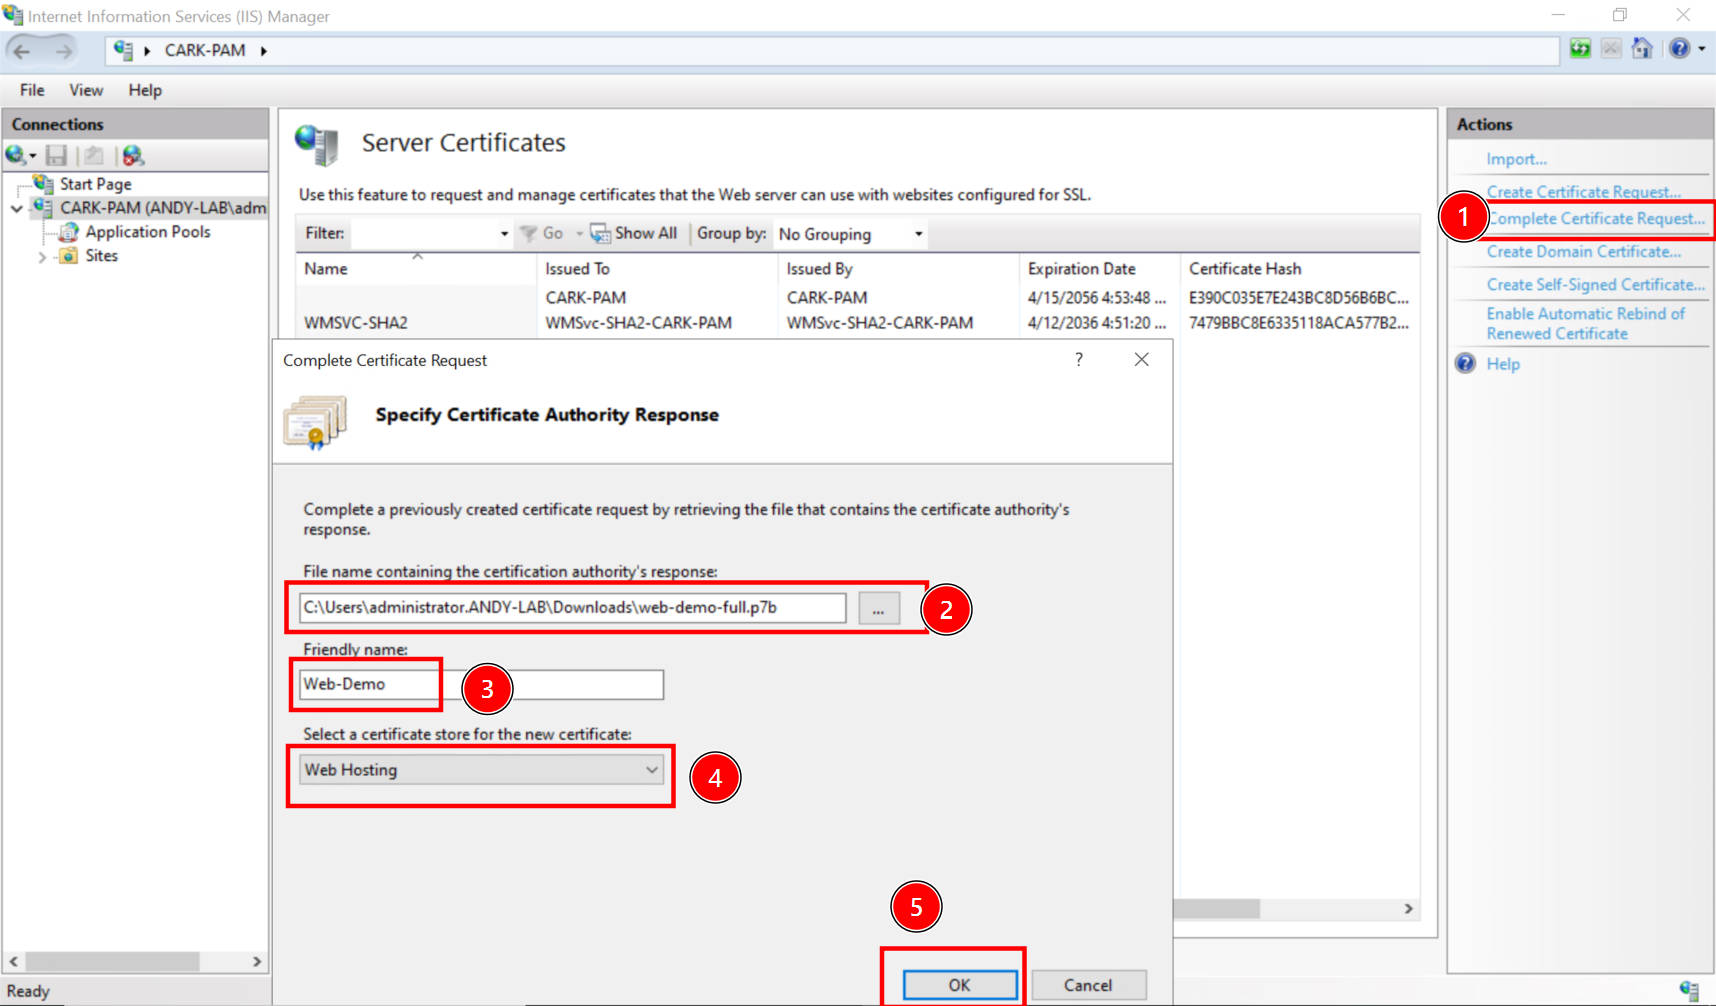
23.Follow step 1 and 2 to open Server Certificate. Than select Complete Certificate Request on right panel. Choose the certificate you download in step 22, give it a friendly name then select Web Hosting for this certificate.
24. Check the certificate, make sure you have private key in this server.

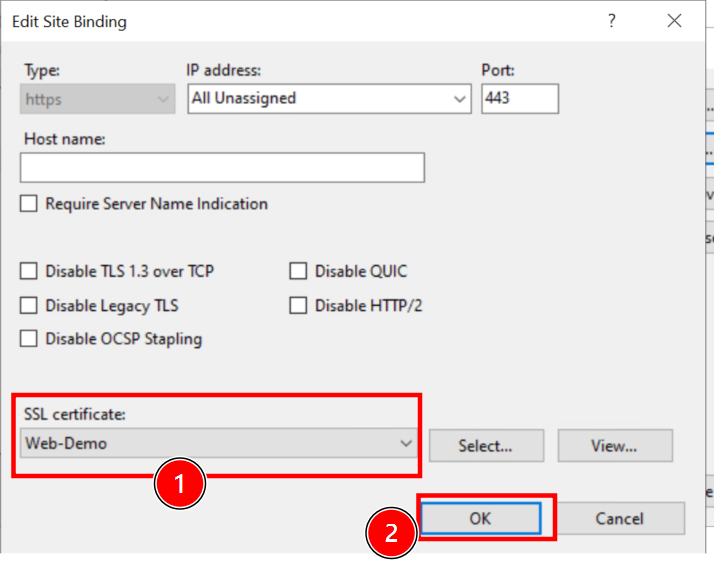
25. Navigate to Default Web Site, select Binding on right panel. Select https then edit.
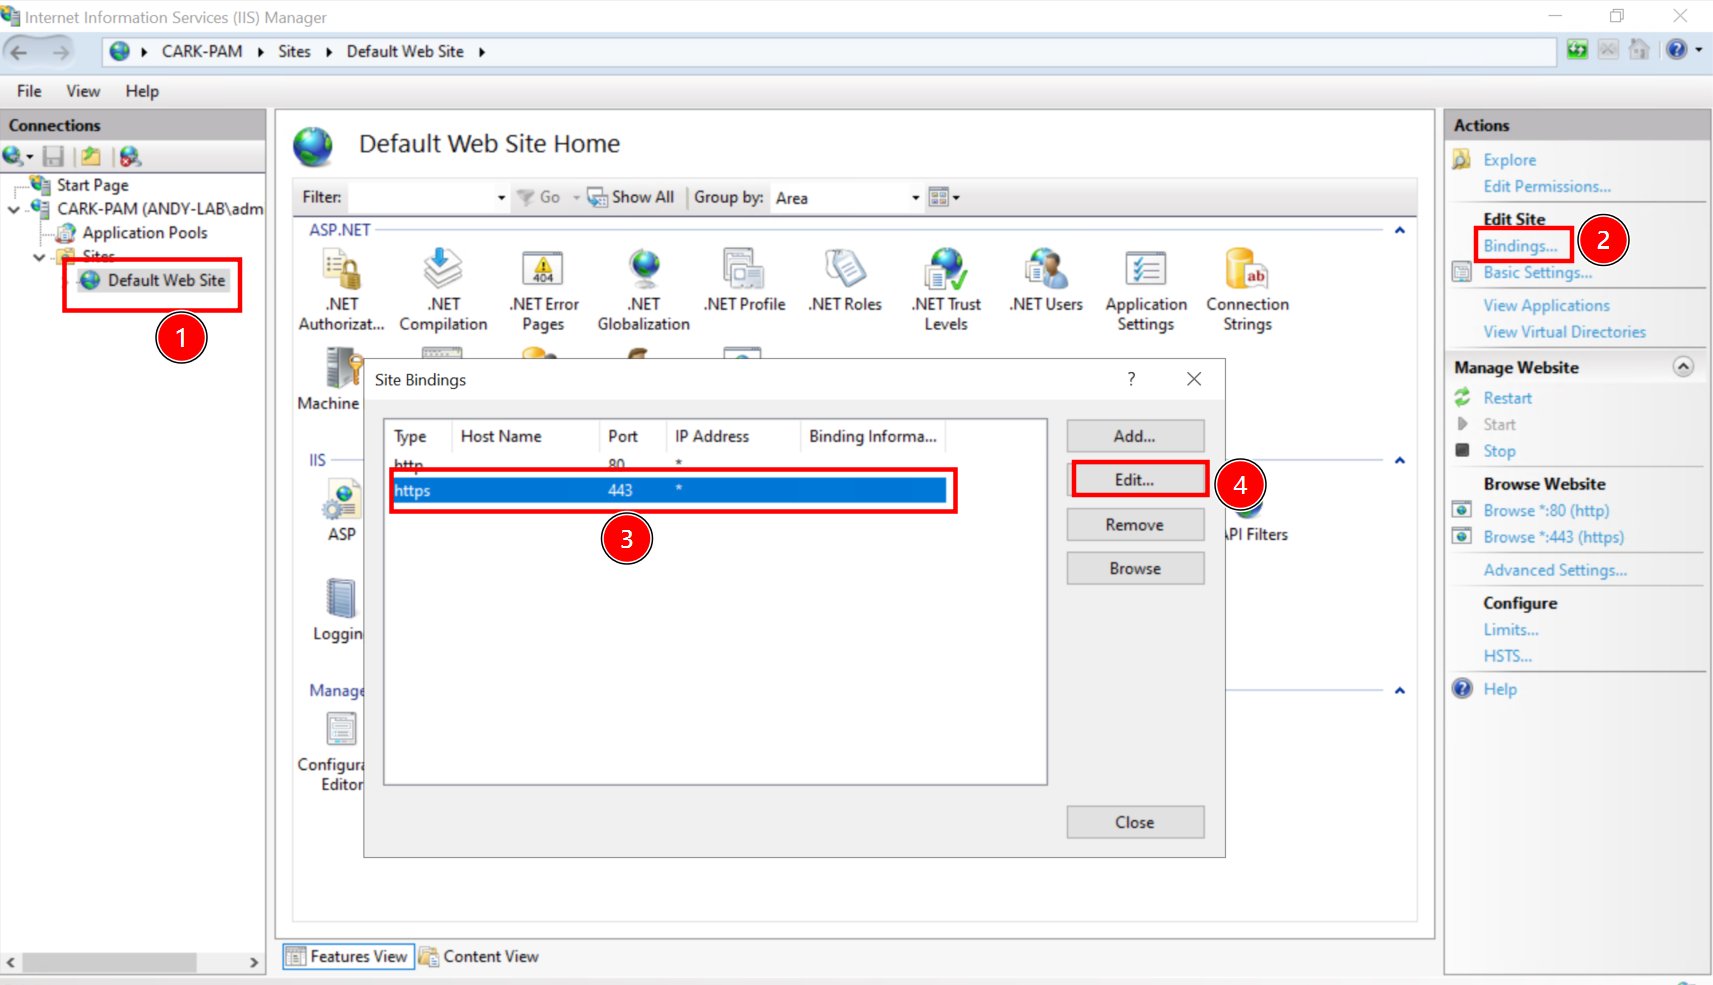
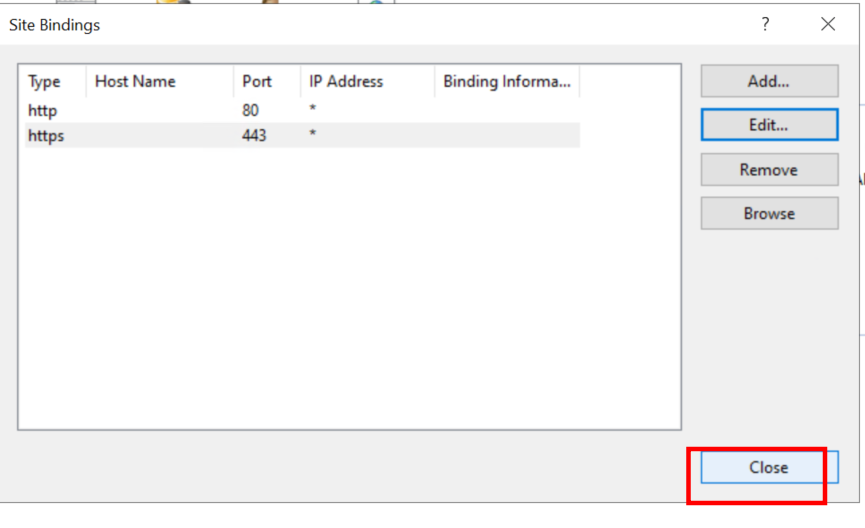
26. Select the certificate we just imported
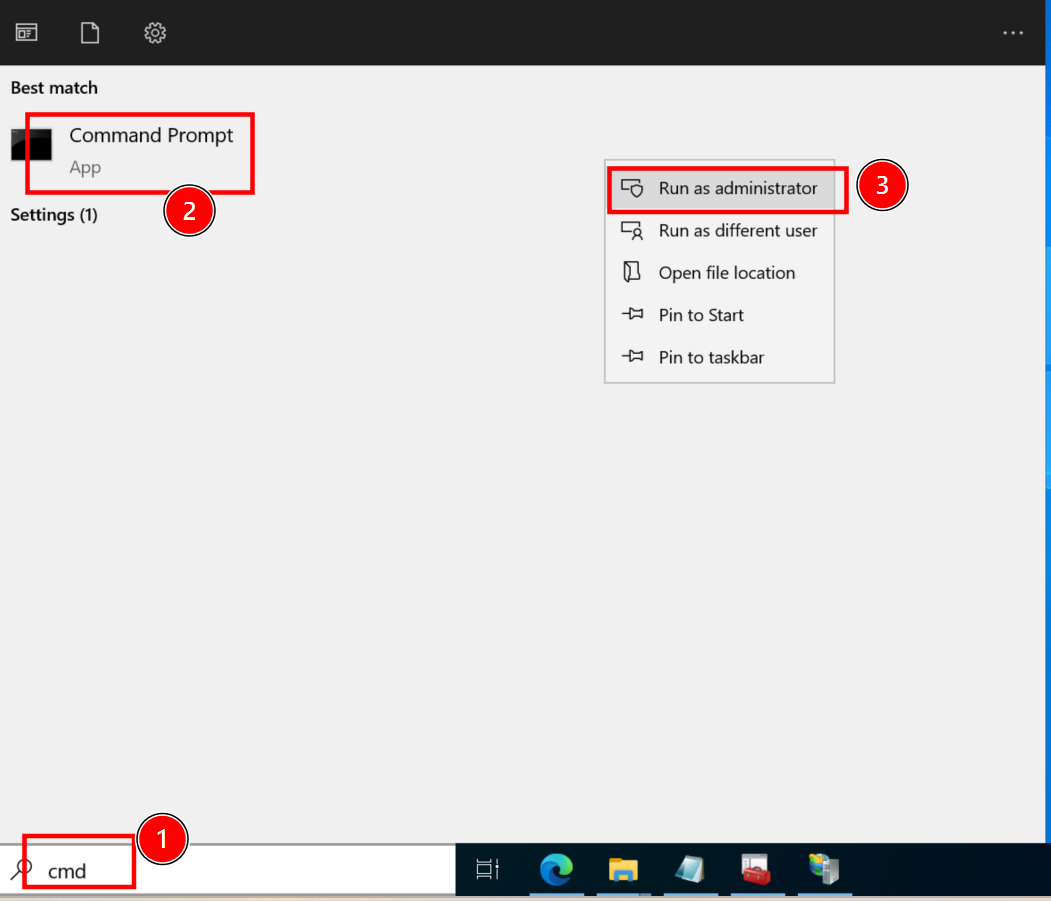
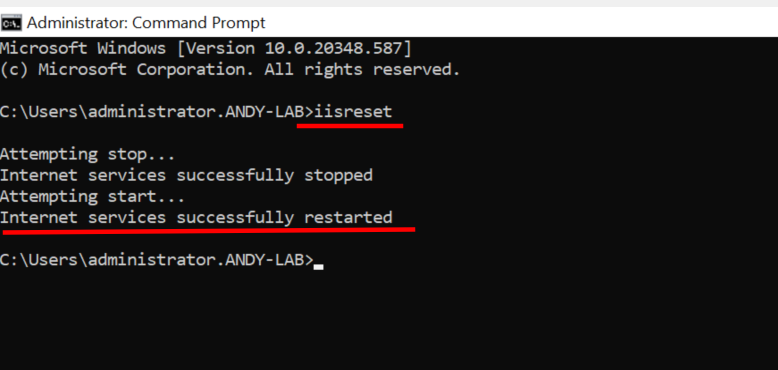
27. Confirm the setting
28. Open an administrative command prompt
29. Restart the web service with its restart
30. Browse to the website, you might sill get error said the website is not secure. That’s because we are using ACDS but my PC does not recognize ADCS’s root CA as trusted. We will have to import the root CA of ADCS into the PC.
(If you are on a domain-joined PC this should work without any additional steps)

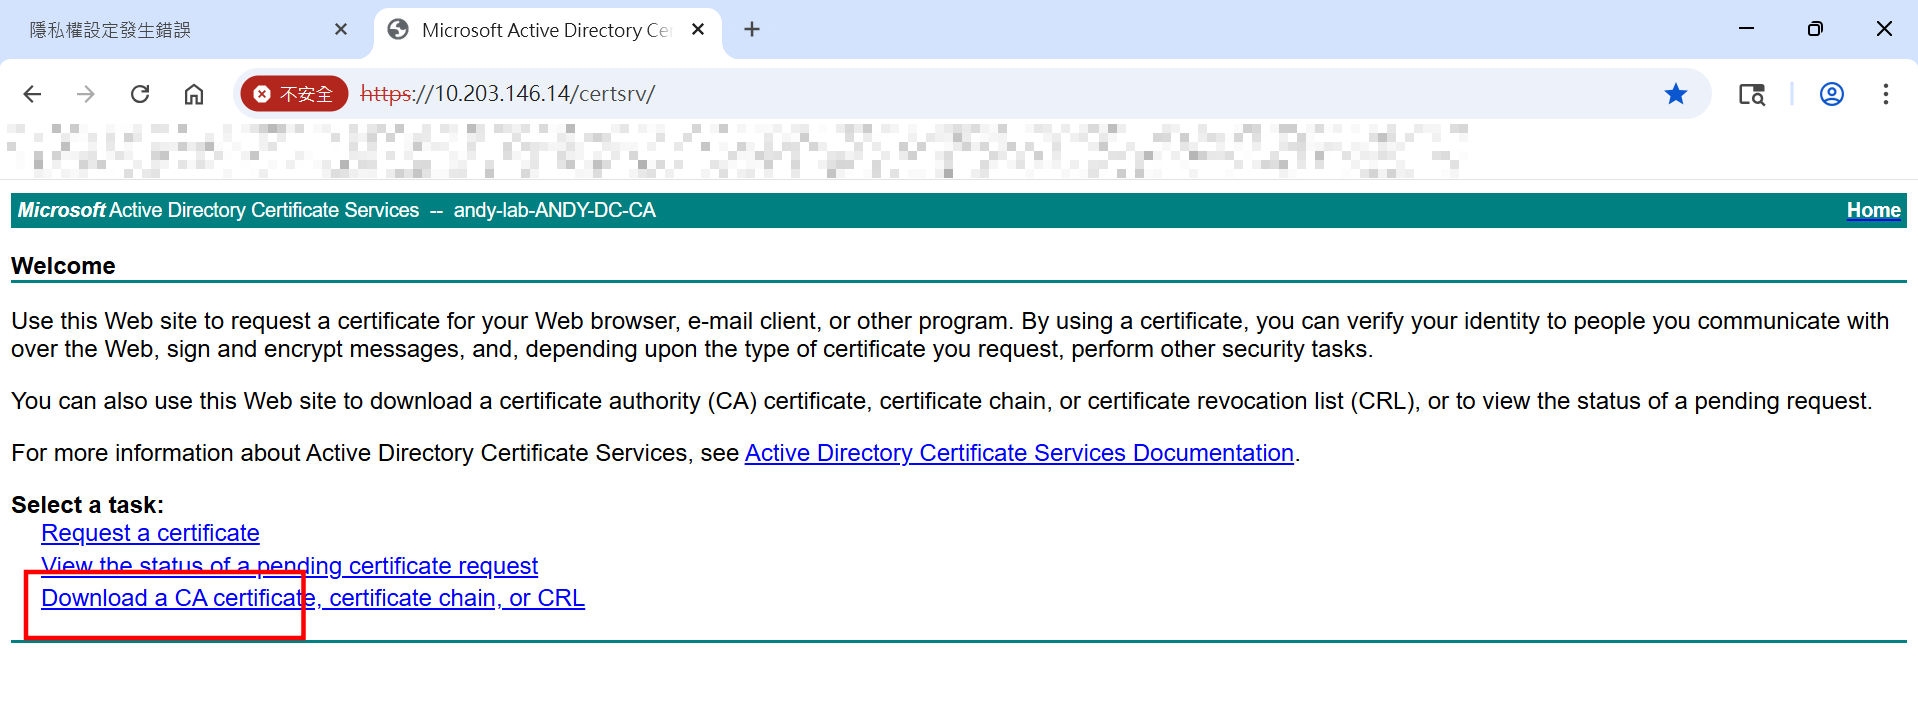
31.Follow step 19, then click on Download a CA certificate
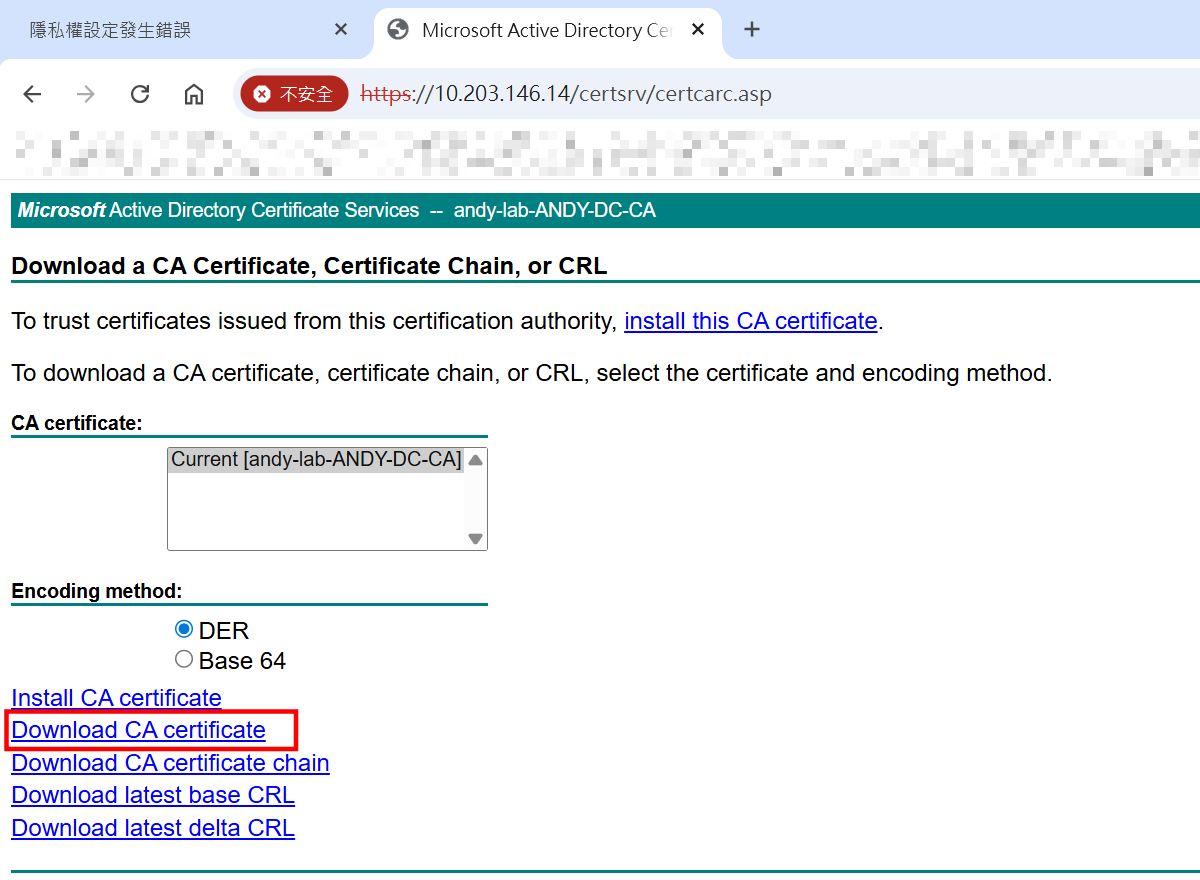
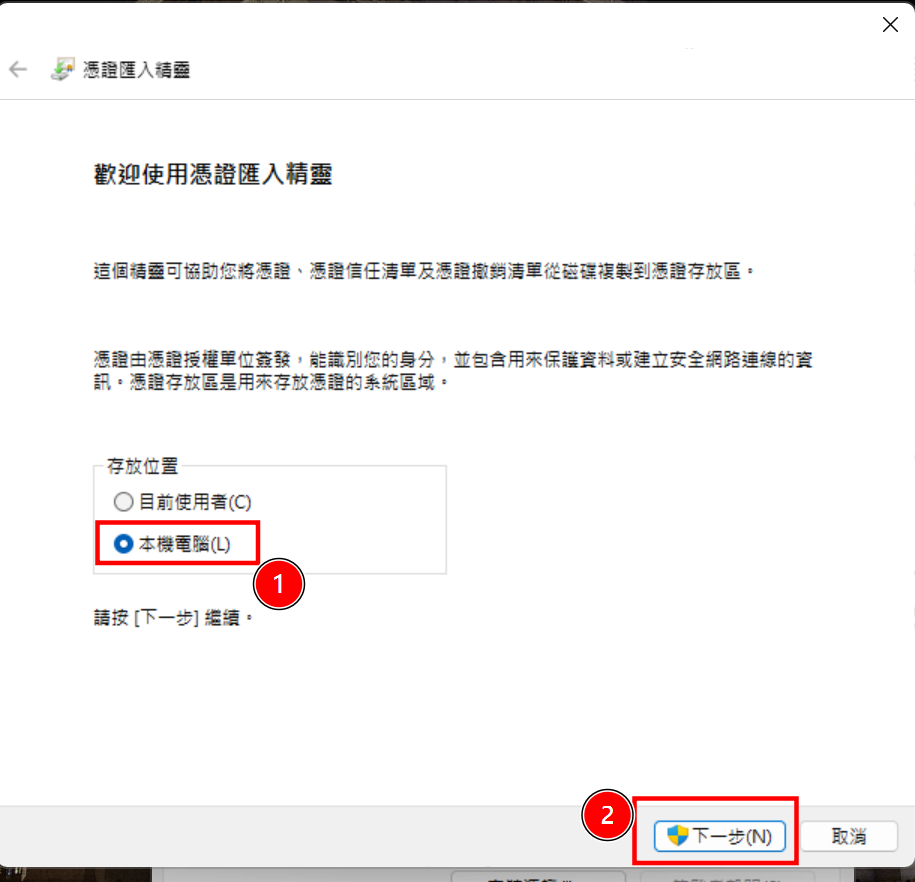
32. Select Download CA certificate
33. Open downloaded certificate, then click install
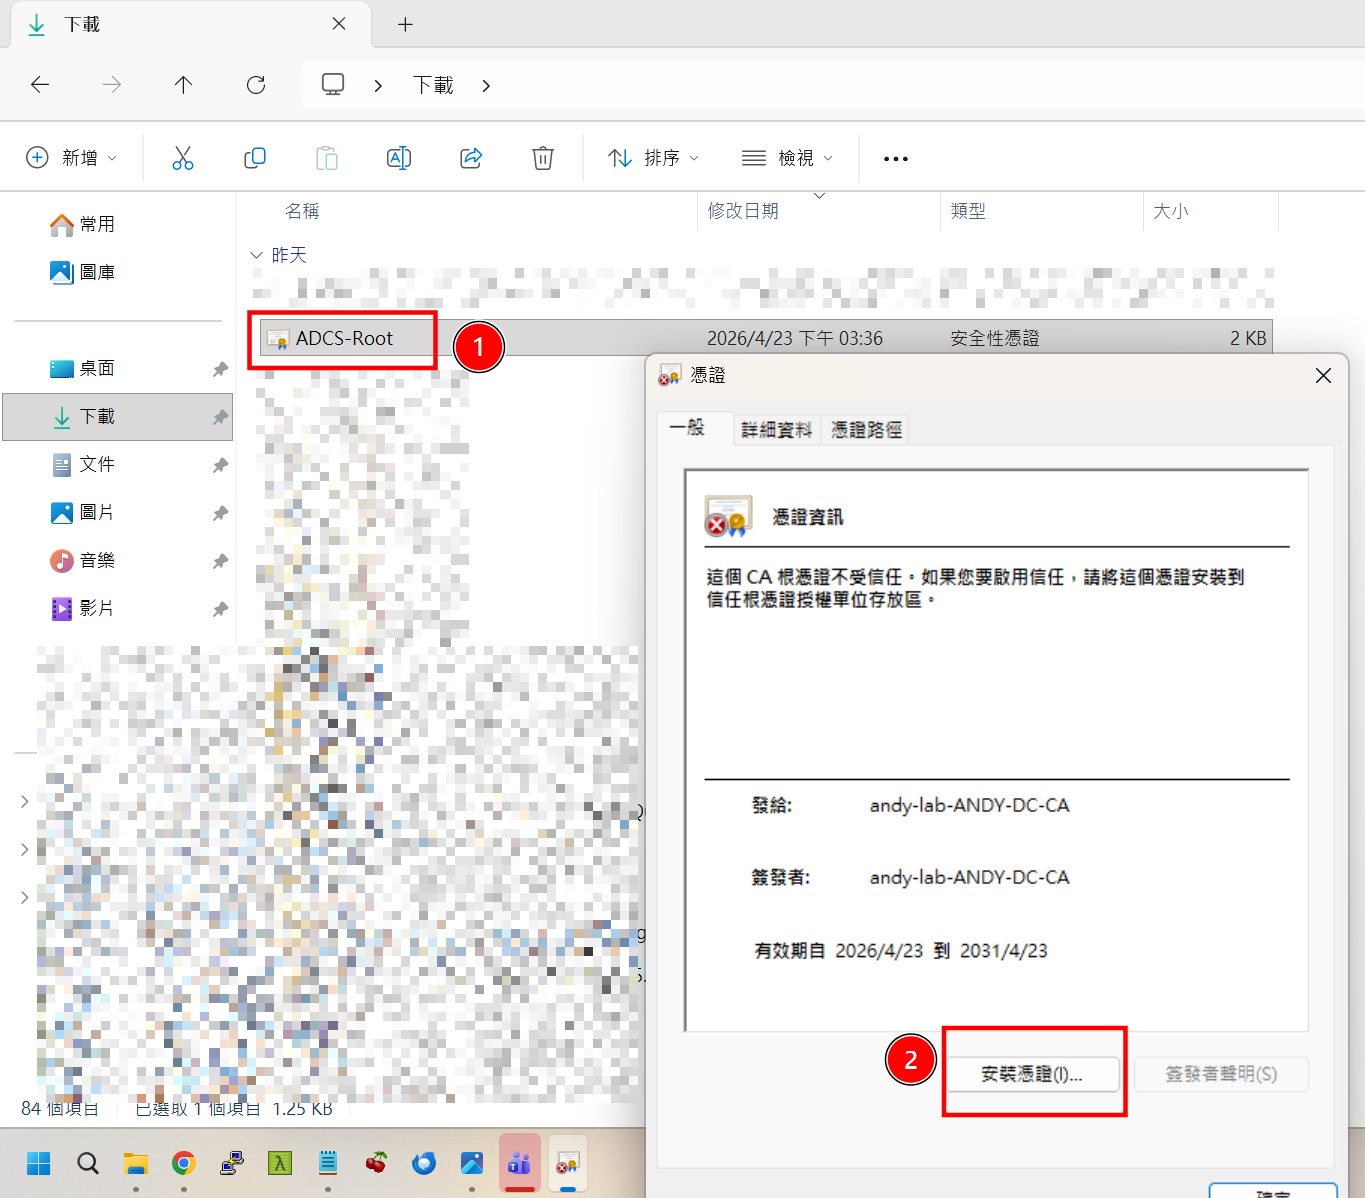
34. Choose local machine
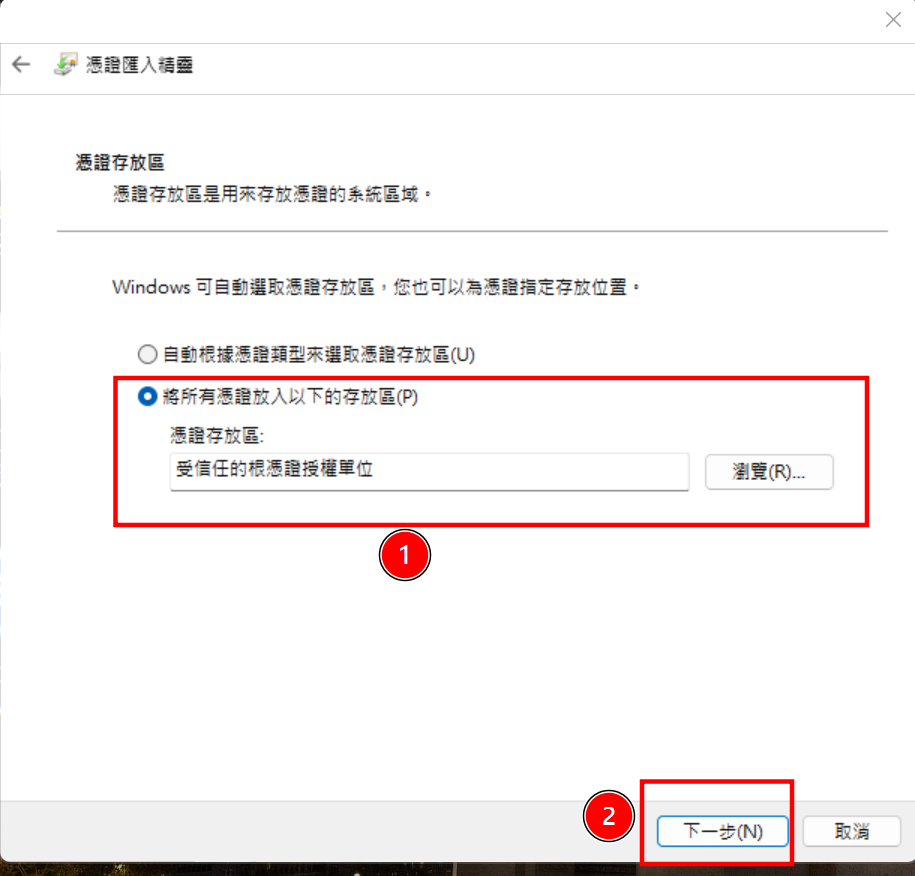
35. Put the certificate under trusted root CA
36. Confirm the install

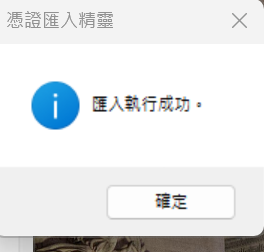
37. System will prompt an successful
38. Try browse again to the website, no warning shows.
