Step 1. login to Cisco switch with console cable and go into configuration mode
Step 2. config authentication method to radius
aaa new-model
aaa authentication login default group radius local
aaa authorization exec default group radius
Step 3. Give your radius server a name
radius server [Name]
Step 4. config radius server information
address ipv4 [radius server ip] acct-port 1813
address ipv3 [radius server ip] auth-port 1812
Step 5. config radius pre-share key
key [pre-share key]
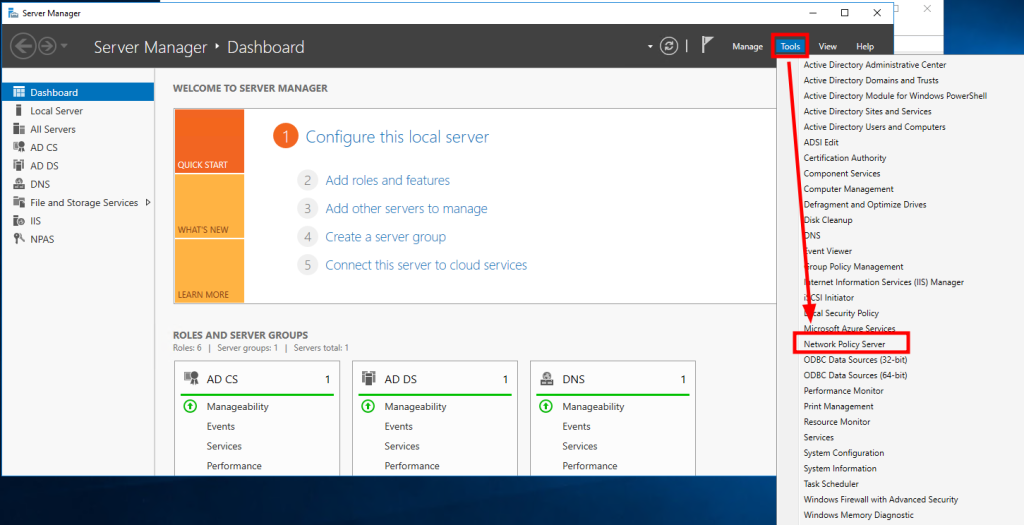
Step 6. Open Network Policy Server(NPS)
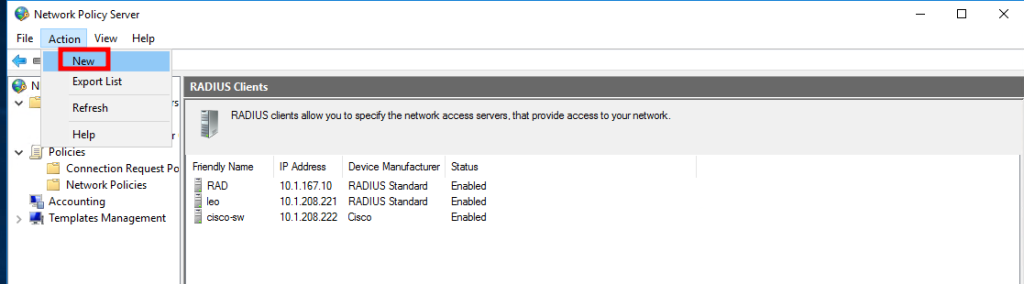
Step 7. Add a new radius client
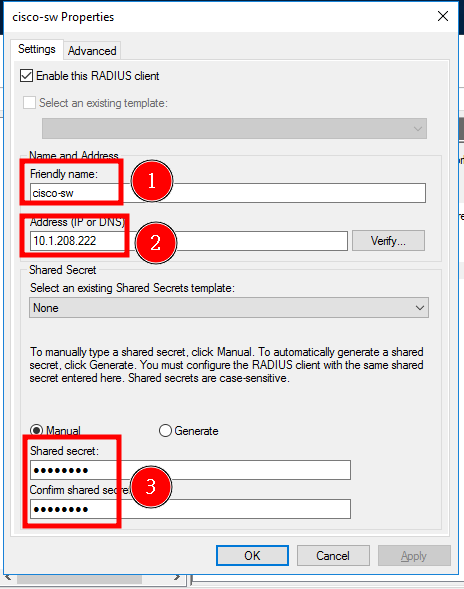
Step 8. give the client a name, put in Cisco switch IP and the same pre-share key in step 5
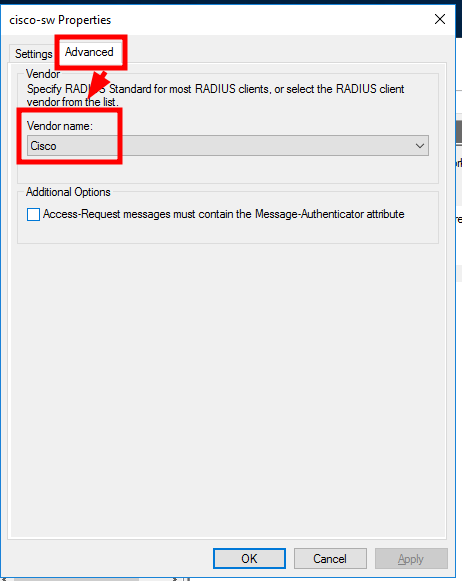
Step 9. Click Advanced and select Cisco from the drop down menu
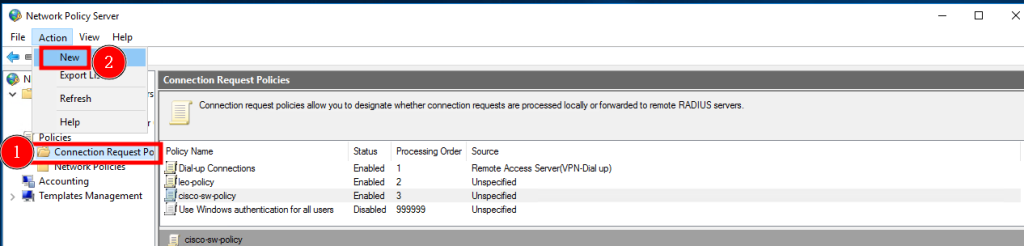
Step 10. Click Connection Request Policy and then click Action>New
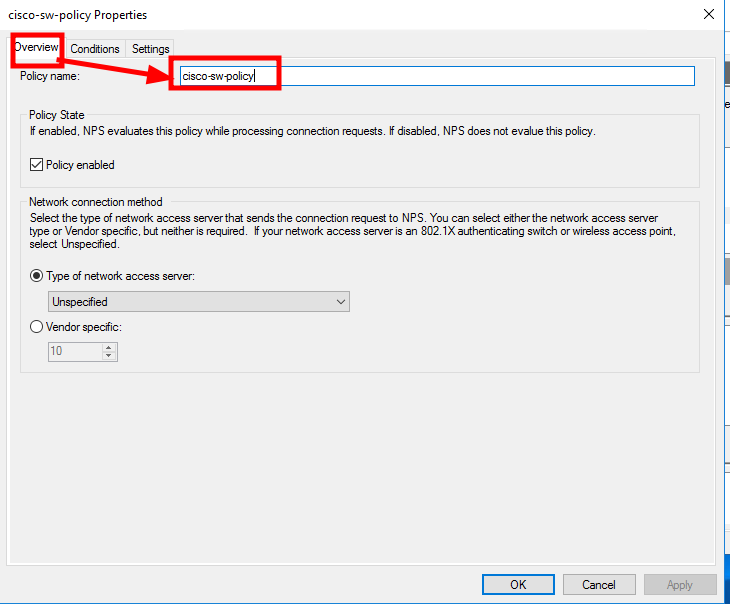
Step 11. Give Request Policy a name
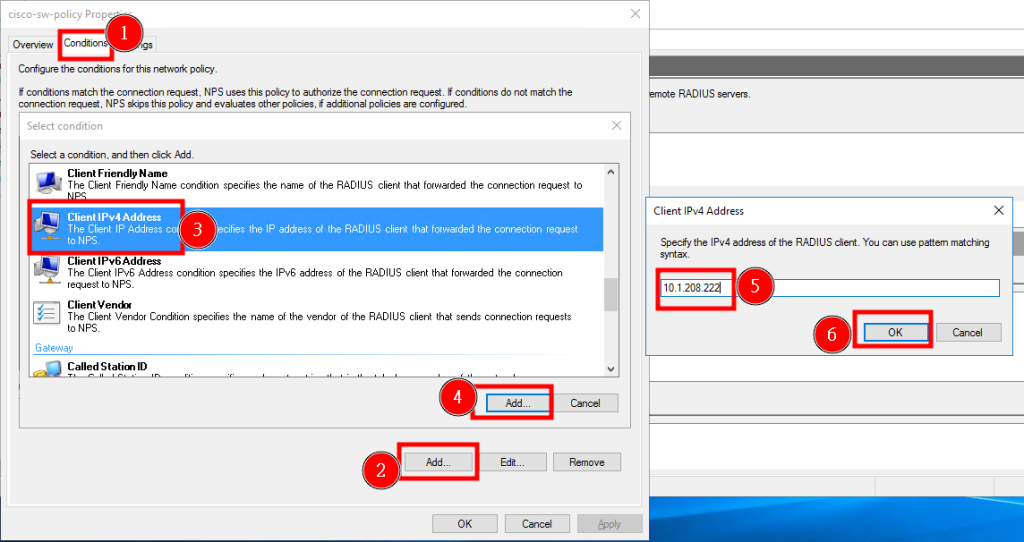
Step 12. Click conditions, then click add , a pop up window will appear
Step 13. Click Client IPv4 Address and then click Add, another pop up windows will appear
Step 14. Enter Cisco switch IP(radius client)
Step 15. Click Network Policies and then Action>New
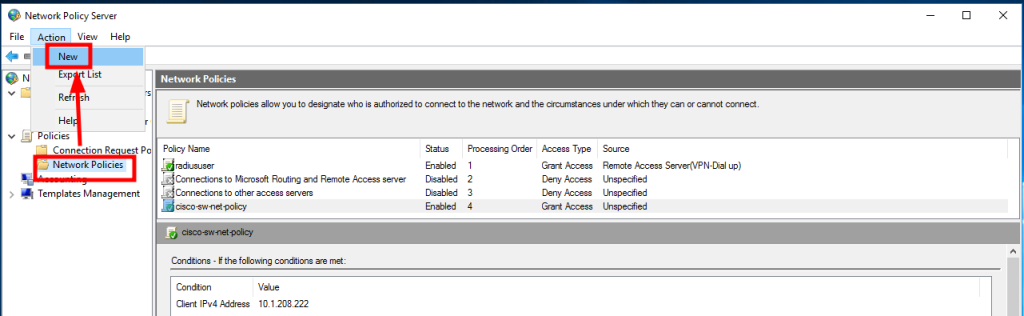
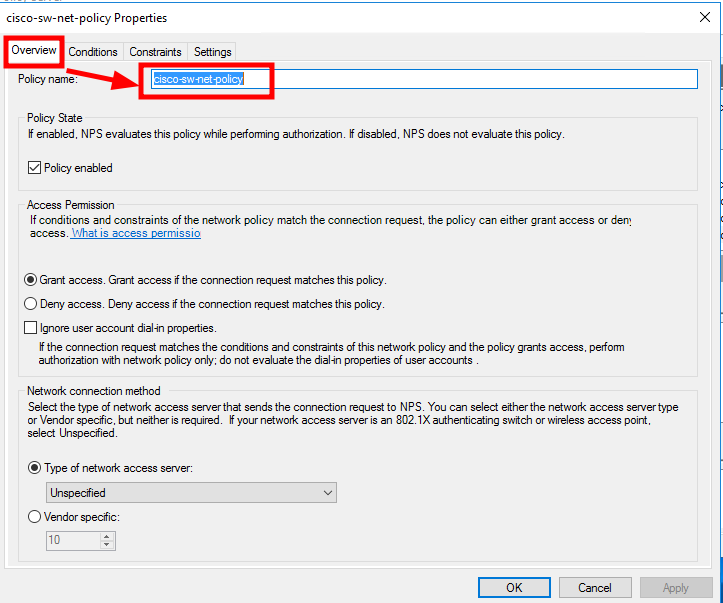
Step 16. Give Network Policies a name
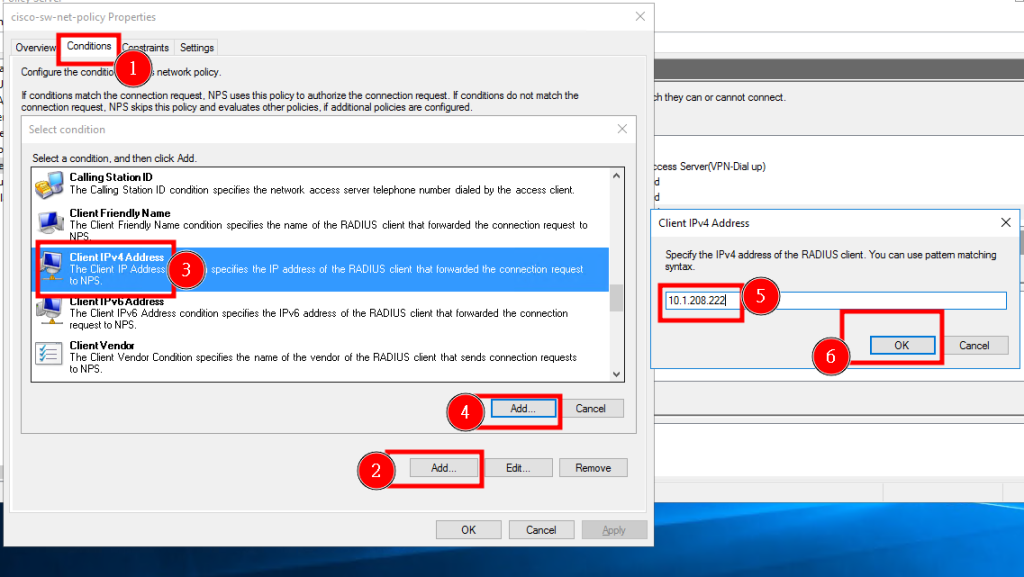
Step 17. Click conditions, then click add, a pop up window will appear
Step 18. Click client IPv4 Address, then add, another pop up window will appear
Step 19. Enter Cisco switch IP(radius client)
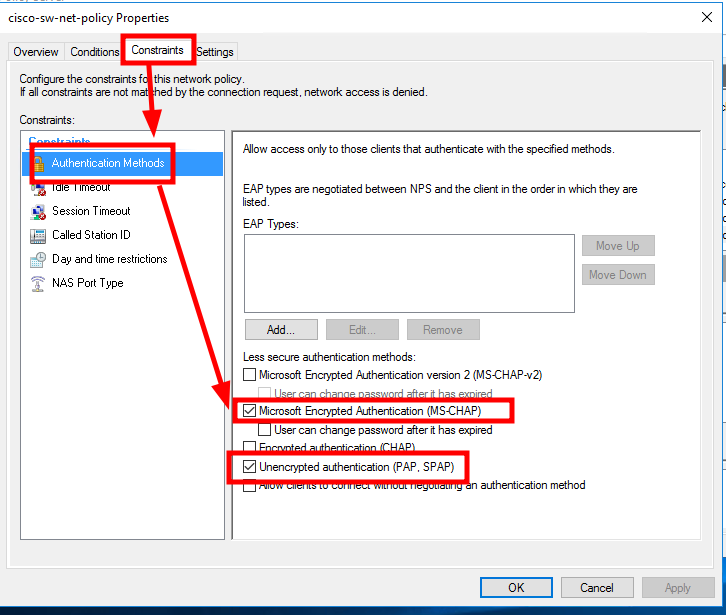
Step 20. Click Constraints, then Authentication methods, enable MS-CHAP and PAP
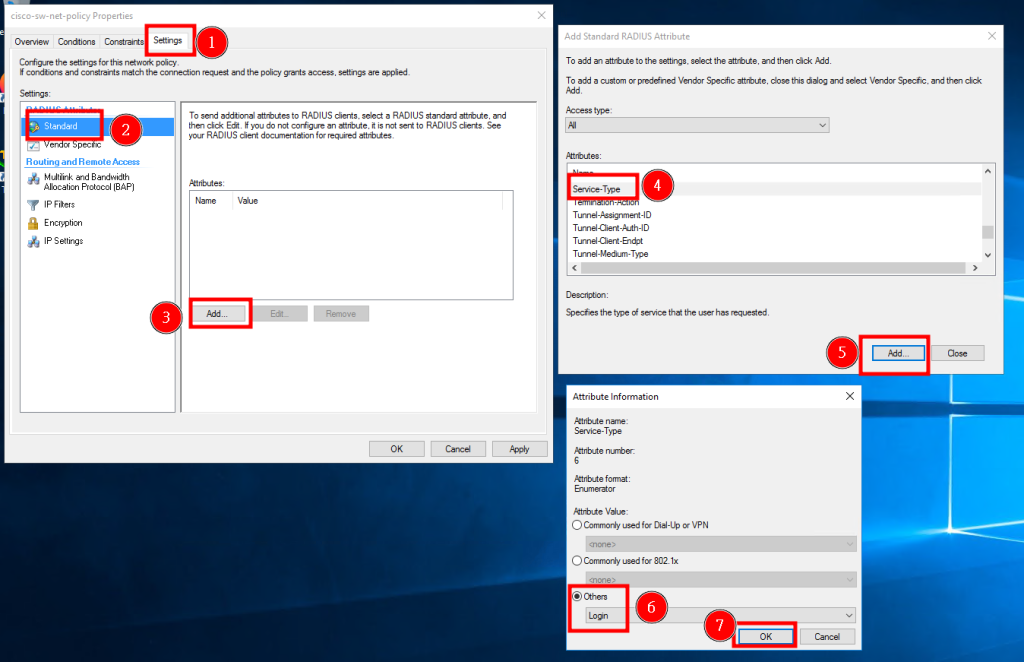
Step 21. Click Settings, then Standard, finally add, a pop up window will appear
Step 22. Select Service-Type, then add, another pop up window will appear
Step 23. Select others, and type in Login
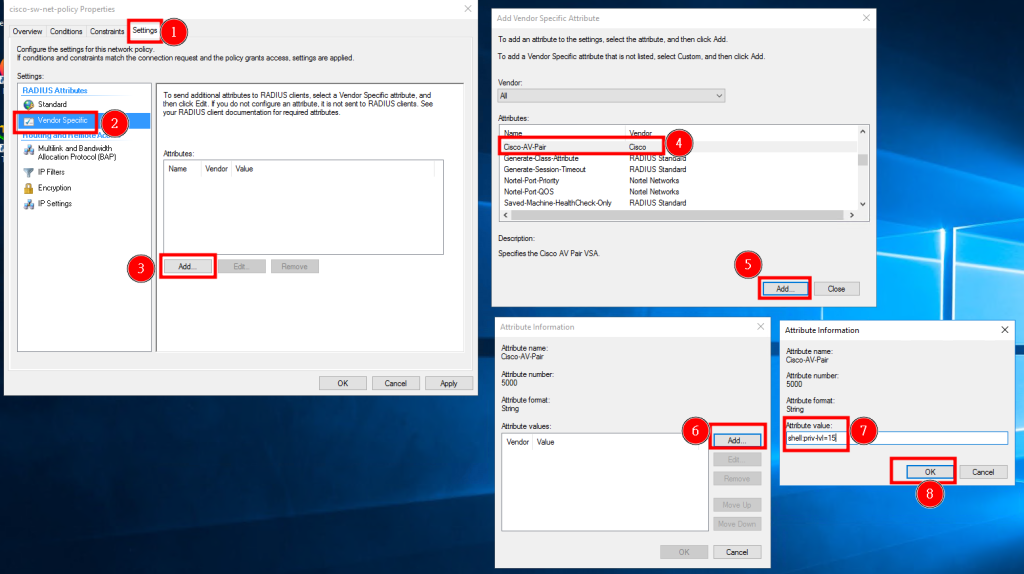
Step 24. Click Vender Specific, then Add, a pop up window will appear
Step 25. Select Cisco-AV-Pair, then add, another pop up window will appear
Step 26. Click Add and enter the syntax as shown below
shell:priv-lvl=15